Week 13 - Composites
The assignment this week was to produce a fiber composite. A composite is made up of two types of material - one that can handle compression well and one that can stretch well. This in turn creates a material that can handle compression and stretch well. In our case, epoxy is the material that can handle compression well and fiber is the material that can handle stretch well. We would essentially be dipping the fiber in epoxy and pushing it down against the shape we want and squeezing out any extra epoxy.
Rob held a tutorial on Wednesday evening showing us how to make composites and the layers that we need.

3D Mold
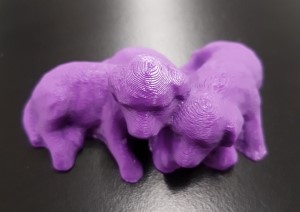
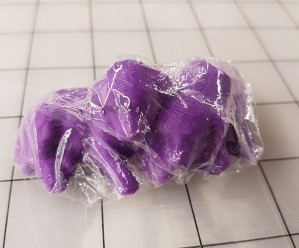
The first requirement of making a composite is to have a 3D mold that you can build a composite on top of. I decided to 3D print puppies using a FDM printer.
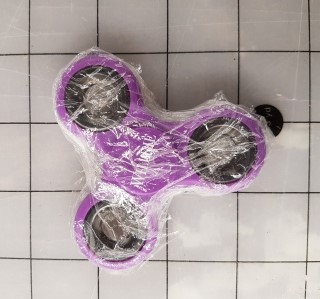
I decided to have fun and test out how composites work with different materials and shapes as well. So, the second composite would be based on a fidget spinner. Law firms this year decided that the best way to recruit law students was to hand out fidget spinners so I had one too many fidget spinners at home.

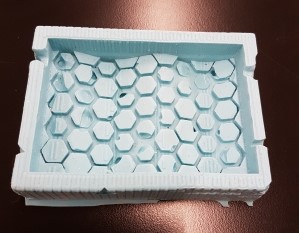
Lastily, I wanted to try a more flexible material, so I chose a mold made of oomoo made by Kevin Jiang from last year's HTMAA class. I thought that the mold that I made for casting week was too small to make a composite.
Layers
I first wrapped the 3D molds with release film, which was just saran wrap. I was a bit concerned about my 3D molds at this point since they were all odd shapes and it was hard to get the saran wrap tightly around the molds. I tried the best I could and continued with the other layers.
Next layer was composite material dipped with epoxy. I cut out fibers in the appropriate size then brushed on the epoxy.
Thirdly, I put a bleeder layer on. Bleeder layer is the funnest part of this week since you just roll this contraption on saran wrap. Bleeder layer is essentially saran wrap with holes in it.

Fourth layer is the breather, which is quilt padding and lastly, you put the release film on again.
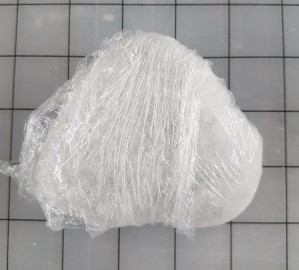
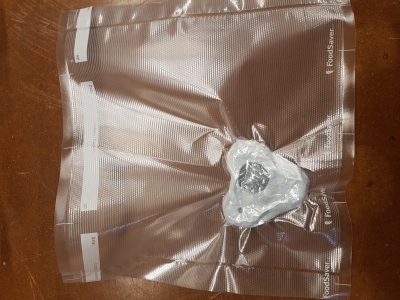
To ensure vacuum seal, I used foodsaver bags and left the composite overnight!


Final Products
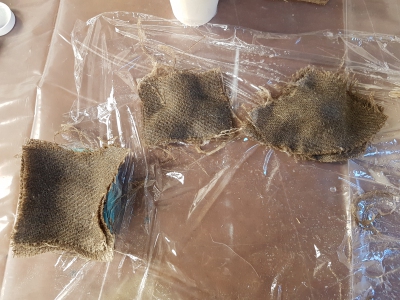
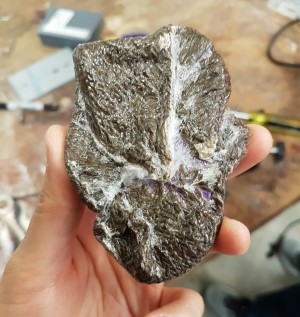
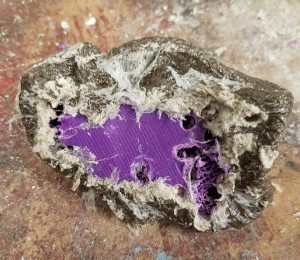
I came into the lab the next day to take the composite out of the vaccum bags. The composite on top of the flexible mold came off easily, but unfortunately shifted a bit during the wrapping or vacuuming process making the composite uneven. The details can be seen more easily on the inside than on the outside.

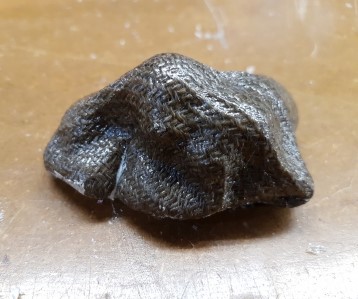
The composites of fidget spinner and puppies were not as easy to remove though as the composites wrapped almost completely around the objects. Because of their odd shapes, I struggled with wrapping the saran wrap as well as putting the composite on the objects. So, I wrapped it around the object to hold them in place without realizing that they would harden completely around it and that it would be very difficult to take the compsosite off.
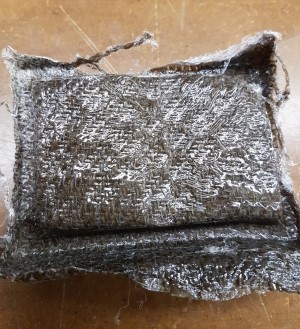
Here is the finished fidget spinner composite!

The finished puppies similarly did not come off the mold well.
In an attempt to remove the composite, we tried using the Dremel rotary tool, but this was creating too much dust. I then tried drilling holes and breaking the composite between the holes. This partially worked, but it was hard to clamp down the edges and I didn't want to risk hurting myself, so I stopped.

Lesson learnt - don't put composite completely around the object and don't try and make composite around very odd shapes.
As always, thank you Rob!